


This entry was posted on May 21, 2021.
To a degree, we’ve today’s technologically sophisticated smartphones to thank for the world’s growing obsession with macro photography. Increasingly, the devices we carry are more than equipped to capture a quality of photo that would have once called for a pro-grade photography rig.
But when it comes to taking truly remarkable macro shots, nothing can compensate for a high-quality camera. Except maybe a keen eye for detail, that is.
Once you’ve had your first taste of the immersive world of macro photography, you realise just how addictive it can be!
What is Macro Photography?
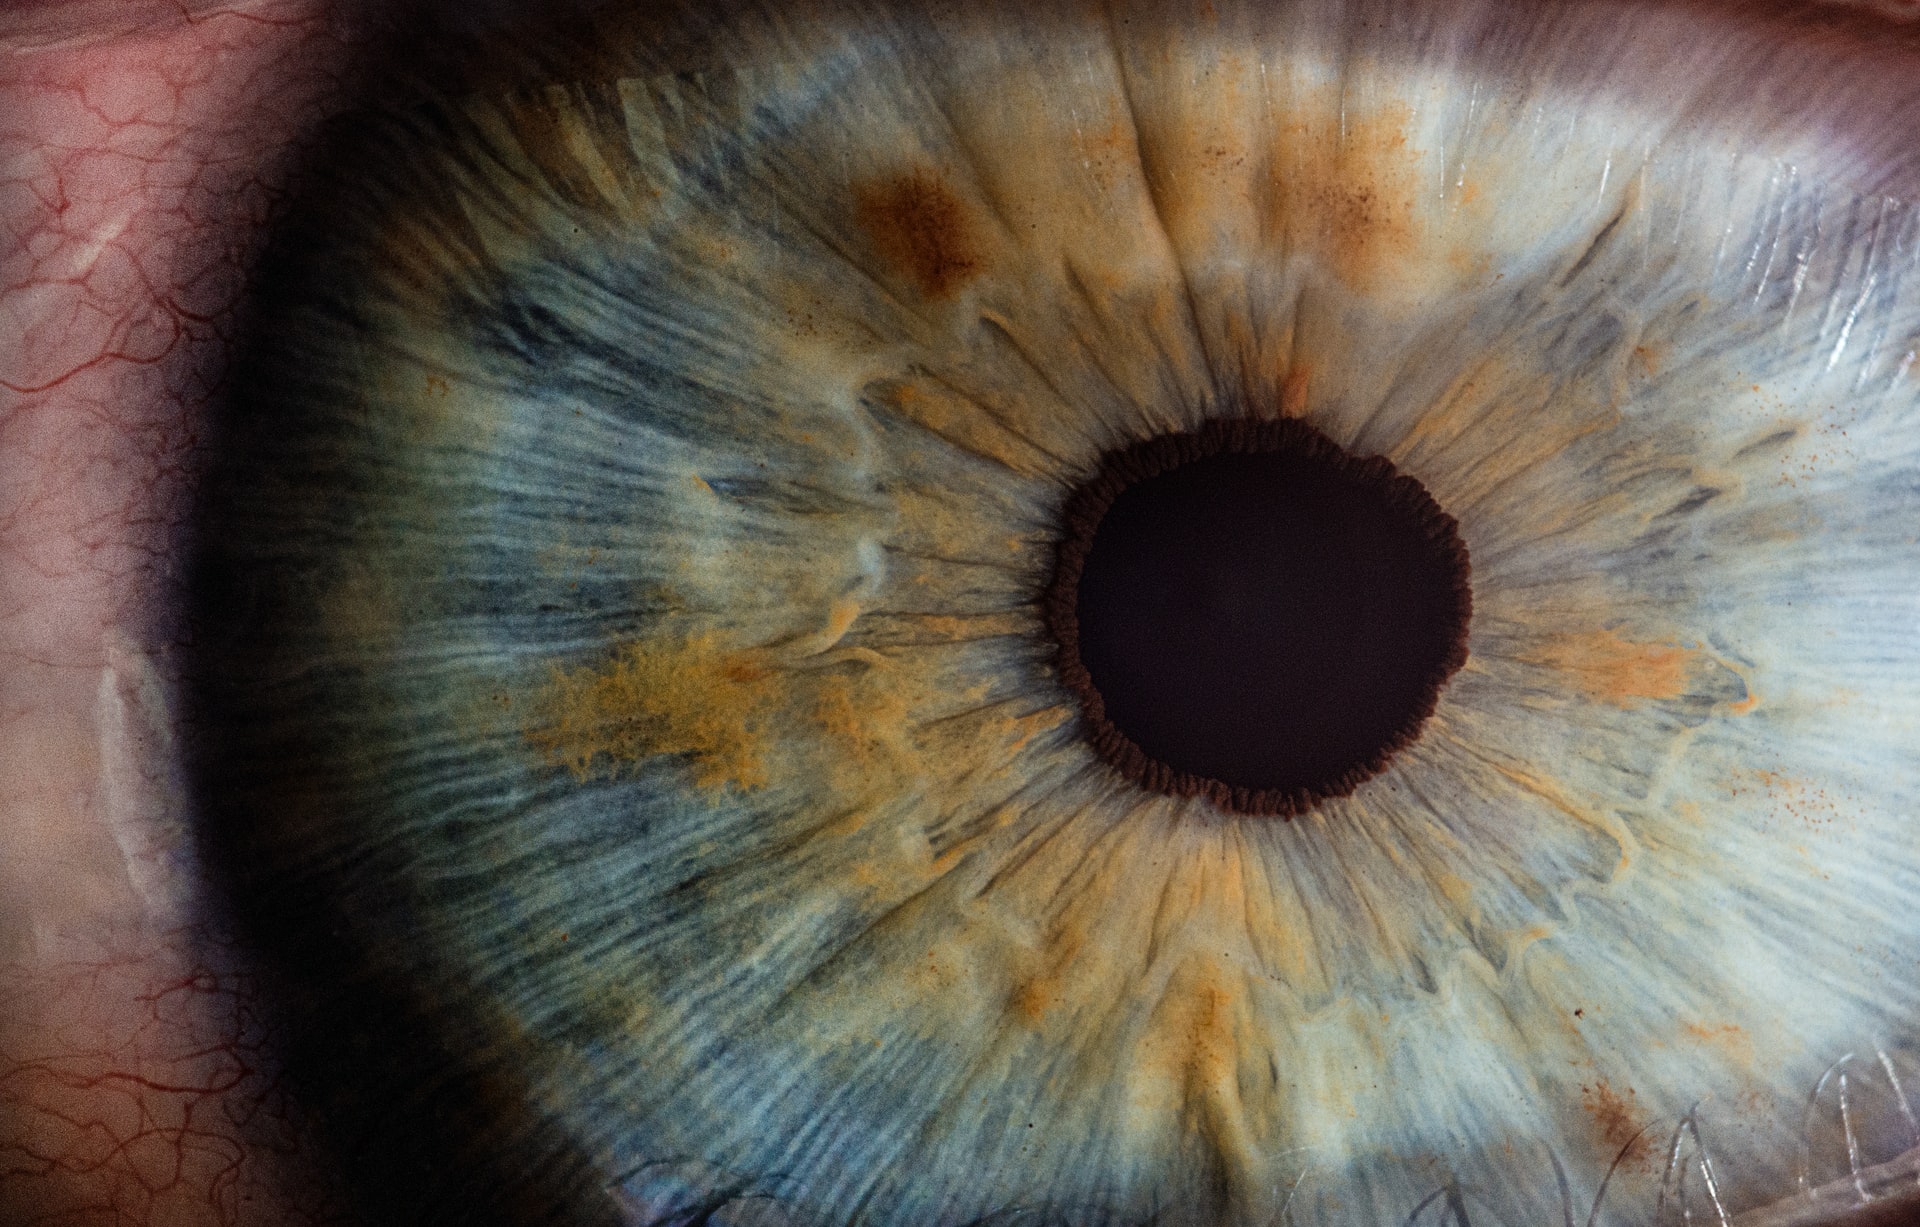
The term ‘macro photography’ is in relation to a form of photography wherein small subjects are captured in a way that makes them look much larger than they actually are.
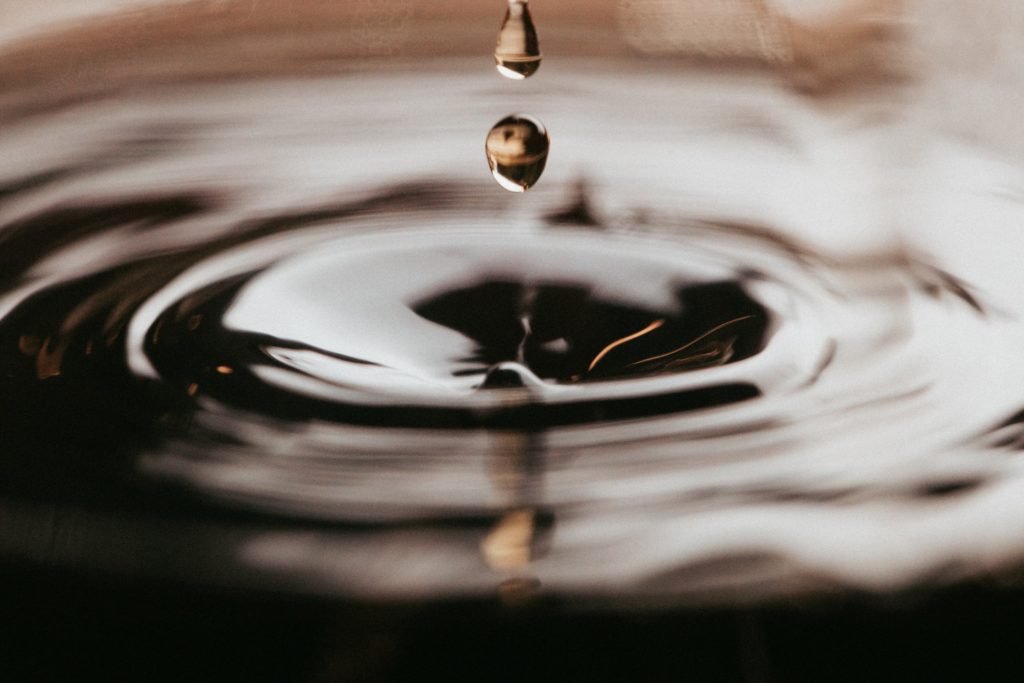
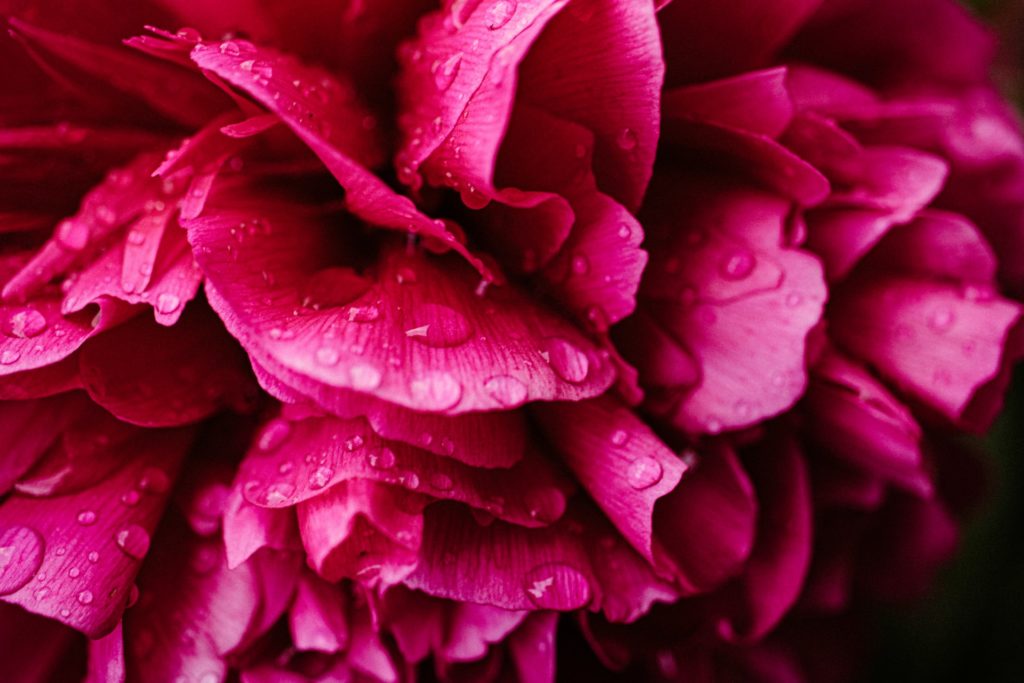
Popular subjects in the field of macro photography include insects, flowers and water droplets. As you can imagine, these all come with fascinating, intricate visual details the naked eye alone cannot normally see.
It’s also used to bring out eye-catching details in subjects for product photography, like jewellery and accessories.
On a technical level, a certain level of magnification is required for an image to qualify as a true macro shot in the formal sense. Macro photography has traditionally referred exclusively to subjects magnified at a ratio of 1:1 or higher.
For example, a 1-inch object projected at 1-inch on the camera’s sensor.
These days, macro photography isn’t quite as rigidly defined. As long as a comparatively small subject has been shot in the kind of detail the naked eye wouldn’t normally pick up, it’s bracketed within the macro photography category.
Not that this is a bad thing. Particularly as the simplicity of capturing close-up shots with mobile devices has generated a wave of interest in macro photography. And its resulted in a whole world of incredible shots being captured and shared, which would otherwise never have happened.
The Key to Captivating Macro Photography
While it’s possible to fake macro shots during the editing process with cropping and zooming, it never produces the same eye-catching results.
If you’re serious about getting up close and personal with your subjects, you need to take the semi-old-fashioned approach.
Advanced photographic technology has simplified the process of capturing incredible macro shots. Now, even for those with little to no knowledge or experience can succeed when they go macro.
Whether you’re experimenting with macro photography as a hobbyist or with commercial intent in mind, the following tips will help you produce results to be proud of:
Tip #1: Invest in a quality macro lens
First up, setting yourself up with a high quality macro lens is a great place to start. While the macro mode on your camera might do a decent job with close-up subjects, a dedicated macro lens will take things to an entirely new level.
This is often the difference between an impressive close-up and a macro shot worthy of a place in a gallery.
High-end macro lenses can also be surprisingly affordable - particularly if you set your sights on an approved used lens with a warranty from the retailer.
Tip #2: Get to know your preferred subjects
Not all objects are suitable subjects for macro photography.
With those that are, it’s not until you examine their finer details that you realise how intricate they can be. It’s therefore a good idea to dedicate as much time and effort as you can to your preferred subjects.
Popular subjects for macro photography include jewellery, butterflies, insects, plants, flowers, rain drops, snowflakes.
You get the gist.
Pretty much anything that has a hidden layer of visual appeal not normally visible to the naked eye. Hone your talents shooting your preferred subjects, rather than spreading yourself too finely.

Tip #3: Use tubes and bellows to shoot moving targets
Let’s face it, anything inclined to bolt if you get too close to it is going to be a challenge. And that’s where lenses with longer focal lengths (or coupled with accessories to increase focal length) are useful.
Bugs, butterflies, beetles, bumblebees - all far more likely to cooperate if you keep a safe distance. Besides which, you only need to have a vague interest in wildlife observation to know the universal truth of it; the best shots come from subjects unaware they’re being photographed.
This kind of macro photography often demands an appropriate tripod or an incredibly steady hand, due to the additional magnification. But it’s often the only way of shooting skittish subjects, rather than frightening them off.
Tip #4: Buy a ‘Third Hand’
This is one of the most indispensable macro photography accessories on the market. It’s also one of the simplest. Third hands hold a wide variety of subjects in exactly the position you need and with the perfect backdrop.
They’re cheap enough to pick up. Or you can try your hand at fashioning your own third hand with whatever you have lying around. While it’s natural to assume that most stunning macro shots were captured 100% organically, you’d be surprised how many were manually engineered using a third hand.
Tip #5: Experiment with different surfaces
If you’re shooting a subject that’s portable and happy to comply, it’s worth experimenting with a variety of different surfaces.
For example, the same piece of jewellery could look entirely different when shot against the natural grain of a wooden tabletop, the sparkle of a granite counter or a light-absorbing matte black surface.
This is a particularly important experiment to conduct when taking up-close product shots. Always remember, the colour and texture of the background can make a huge difference.
Tip #6: Customise your background
You can also use your third hand (or DIY alternative) to customise the backgrounds of your shots.
Use the device to hold the subject in a variety of different positions. Then take shots from different angles to see what works. You can even go so far as to place your own accessories and features in the background, to achieve the desired effect.
As it will usually be blurred, it’s not always advisable to focus too much on the finer background details. Place more emphasis on the colours and textural components of the background; opt for something that contrasts perfectly with the main subject of the shot.
Tip #7: Be mindful of lighting
The importance of appropriate lighting takes on even greater significance when shooting macro.
Lighting conditions that permit a perfectly adequate shot under normal conditions might not illuminate the finer details of your subject. Even when natural lighting conditions appear optimal, they may still not provide the in-depth illumination needed for perfect macro shots.
For beginners, a ring flash or twin flash is a good place to start. Both of which are ideal for bringing three-dimensional lighting into your shots, taking things a step further than a flat flash combined with the ambient lighting in the setting.
Tip #8: Experiment with points of focus
When shooting subjects close-up, it’s incredible the massive difference it makes shifting your focus even a millimetre or two. Even if you have a carefully planned point of focus, it can still be useful to experiment with minor adjustments.
The perception of a close-up shot can be radically altered with pinpoint adjustments to the point of focus. This often results in a shot you hadn’t initially imagined. But you may find it’s an even more striking snap than what you had in mind.
Tip #9: Don’t rely on editing
You should be aiming to reach a point where the macro shots you take require little to no editing whatsoever. Generally speaking, the more you need to edit your photos, the more you should be focusing on your technique instead.
Quality macro shots provide the viewer with the opportunity to see something they wouldn’t normally see. Or something they may have never seen before. With that in mind, it’s no wonder why artificial embellishments post-capture should be kept to the bare minimum at best.
Tip #10: Take your time and persevere
Last but not least, the art of immaculate macro photography is not something you can expect to master overnight. Even where the technicalities of macro photography are relatively straightforward, establishing an eye for what makes the perfect subject and backdrop takes time and effort.
Setting yourself up with the right gear will certainly help, but is no substitute for perseverance and tenacity. Though it is safe to say that the rewards more than justify the efforts required. Trust us, the satisfaction of capturing breath-taking macro shots really is a joy beyond compare.