


This entry was posted on July 7, 2022.
In this beginner's guide to the exposure triangle, you’ll find the exposure triangle explained. Apart from giving you the definition of the exposure triangle, we’ll explain how to use it to master exposure in photography and get the best images.
But as confused as you might be right now, with time, practice, and some guidance, getting the balance of aperture, shutter speed, ISO, and the relationship between the three will become second nature.
What Are the Elements of the Explore Triangle?
The three elements of the exposure triangle are aperture, shutter speed, and ISO.
When looking at these three elements, it’s easiest to think of an exposure triangle, with each component interacting with the other which results in a good exposure. Each component of the exposure triangle has a slightly different way of manipulating light hitting the sensor, and therefore the quality of the exposure that results:
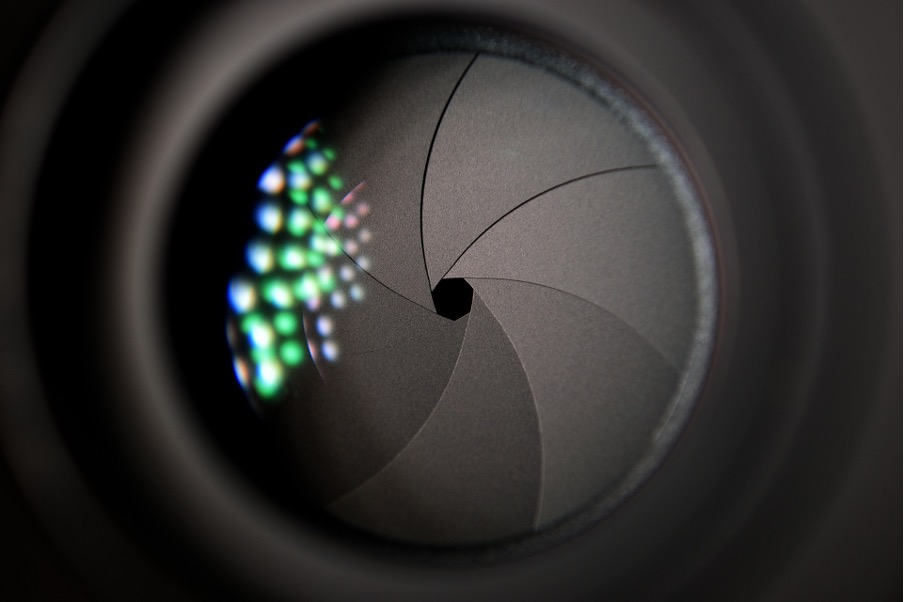
- Aperture is the size of the lens opening. It controls the amount of light that enters the lens. The larger the opening, the more light; the smaller the opening, the less light.
- Shutter speed controls how long the shutter is open. That means it controls the duration of light that's allowed to hit your camera's sensor. The longer the shutter speed, the more light that results. The shorter the shutter speed, the less light that hits the sensor.
- ISO controls the sensitivity of your camera's sensor. The higher the ISO, the more sensitive it is. The lower the ISO, the less sensitive the sensor is to light.
These three elements of the exposure triangle work together to create an exposure value (EV). This means that you can't always change one setting without directly impacting one or both of the other elements of the light triangle.
The Impact of Each Exposure Triangle Element
When we look at each element's impact on the others, let’s look at a scenario. You're taking a portrait outdoors on a sunny day. You've got your camera mounted to a tripod and have selected the following settings:
- Aperture - f/8
- Shutter Speed - 1/125 seconds
- ISO - 400
You’ll find that the image is far too bright or overexposed with those settings. In that case, you have several choices to correct the situation:
- You could use a smaller aperture, such as f/11, to restrict the amount of light, a faster shutter speed, for example, 1/250 seconds, to reduce the duration of light hitting the sensor or you could use a smaller ISO, say 200, to make the sensor less sensitive to light.
- Conversely, if you find that your image is too dark, an opposite action would be needed, such as using a larger aperture, a slower shutter speed, or a larger ISO.
Simplifying the Exposure Triangle
If you think of the exposure triangle in more familiar terms, it simplifies each aspect, so it’s helpful to think of the camera as your brain and the lens as your eyes. Just like your eyes can see but need your brain to record what they see, your lens can see but needs the camera to record what it sees.
In this sense, liken your eyelids to the aperture of a lens: the wider you open your eyelids, the more light that can enter your eyes. So, opening your eyelids wide would be similar to a large aperture, such as f/1.8. However, squinting to restrict the amount of light entering your eyes would be like a small aperture, for example, f/16.
In terms of shutter speed, we can liken this to blinking. The more you blink, the more the duration of light is restricted. Blinking a lot would be similar to using a fast shutter speed, such as 1/500 seconds. However, lengthening the time between each blink allows more light to enter your eye. Think of that as using a slow shutter speed, say 1/30 seconds.
Finally, think of sunglasses as ISO for your eyes. Wearing sunglasses makes your eyes less sensitive to light, like using a low ISO like 200. If you were to remove those sunglasses on a bright day, your eyes would become more sensitive to the light, similarly to using a high ISO such as 1600.
Measuring the Three Elements of the Exposure Triangle
Part of what makes the exposure triangle difficult to grasp is how aperture, shutter speed, and ISO are measured. All three elements are measured using "stops." One-stop equals a doubling or halving of light.
For shutter speed and ISO, those numbers are pretty straightforward:
- Shutter speed is measured in fractions of a second, like 1/250th of a second. Moving one stop up makes the shutter speed 1/500th of a second, which is twice as fast. Moving one stop down makes the shutter speed 1/125th of a second, which makes it twice as slow. This makes it easy to understand how each stop doubles or halves the light.
- ISO is measured in whole numbers like 100, 200, 400, and so on. Moving from ISO 400 to ISO 800 doubles the sensitivity to light. Moving from ISO 400 to ISO 200 halves the sensitivity to light. Again, this is easy to comprehend as the numbers are nice and even from one stop to the next.
The hardest element to understand is aperture, as although it is measured in stops, typically referred to as f-stops, the numbers used are confusing in two ways:
- Firstly, the aperture value is the inverse of the opening size. A large aperture is indicated by a small number like f/1.8. Conversely, a small aperture is represented by a large number, like f/22.
- Secondly, f-stops don't appear as nice, even numbers like shutter speed and ISO. So, if you're shooting at f/4, to double the light entering the lens, you would need to change the aperture to f/2.4. To halve the light, you'd need to change the aperture to f/5.6.
You don't have to memorise the f-stop numbers for aperture or settings for shutter speed or ISO. What's important is that you understand what changing each setting does to the exposure triangle. As long as you consider that a larger aperture number means a smaller aperture and vice versa, you'll soon get the hang of it.
Other Impacts of Exposure Settings
Another aspect of the exposure triangle is that each of the exposure settings impacts the artistic look of an image; for example, shutter speed also controls motion blur, aperture controls depth of field, and ISO increases or decreases noise.
As you increase the shutter speed, motion blur decreases. You need to use a faster shutter speed if you want to freeze movement. Conversely, if you want to blur movement, you’d use a slower shutter speed.
As you increase the aperture size, the depth of field decreases. For example, if you want to create a blurred background for a portrait, you’d need to use a large aperture like f/2. If you want a background that's in focus, such as a landscape shot, a smaller aperture such as f/11 would be needed.
As you increase the ISO, the presence of noise also increases. This noise looks like grain and can be used artistically, often in black and white images, to give them a grittiness. If you want grain for effect, you can increase the ISO; if you want a clear, crisp image, you will use the lowest ISO available.
We have some useful guides on each element of the exposure triangle, which go into more detail which you may find helpful. The key to getting the very best shots is practice and experimenting.
If you need any help or advice, all our advisors are passionate about photography and are always happy to pass on their wealth of knowledge. Find the best deals on new and used cameras, visit one of our stores in London, Essex or Stevenage or take a look online. You'll find a vast range of photography equipment at great prices and expert advice.