How to Use and Buy Polarising Filters
Does your camera have the ability to use filters?
If so – one of the most useful filters to consider purchasing is a polarising filter. Believe me – the ‘wow factor’ that it brings to many of the shots you’ll take has to be seen to be believed.
A lot can be said about the technicalities of how they work but to keep this post brief let me head straight to the benefits of using one.
Polarising filters change the way that your camera sees and treats light. Particularly – when using one you’ll notice a change in how your camera sees reflections and glare. As a result it also has the ability to change the vibrancy of some colours in shots.
Let’s look at a few areas where polarising filters can have the biggest impact:
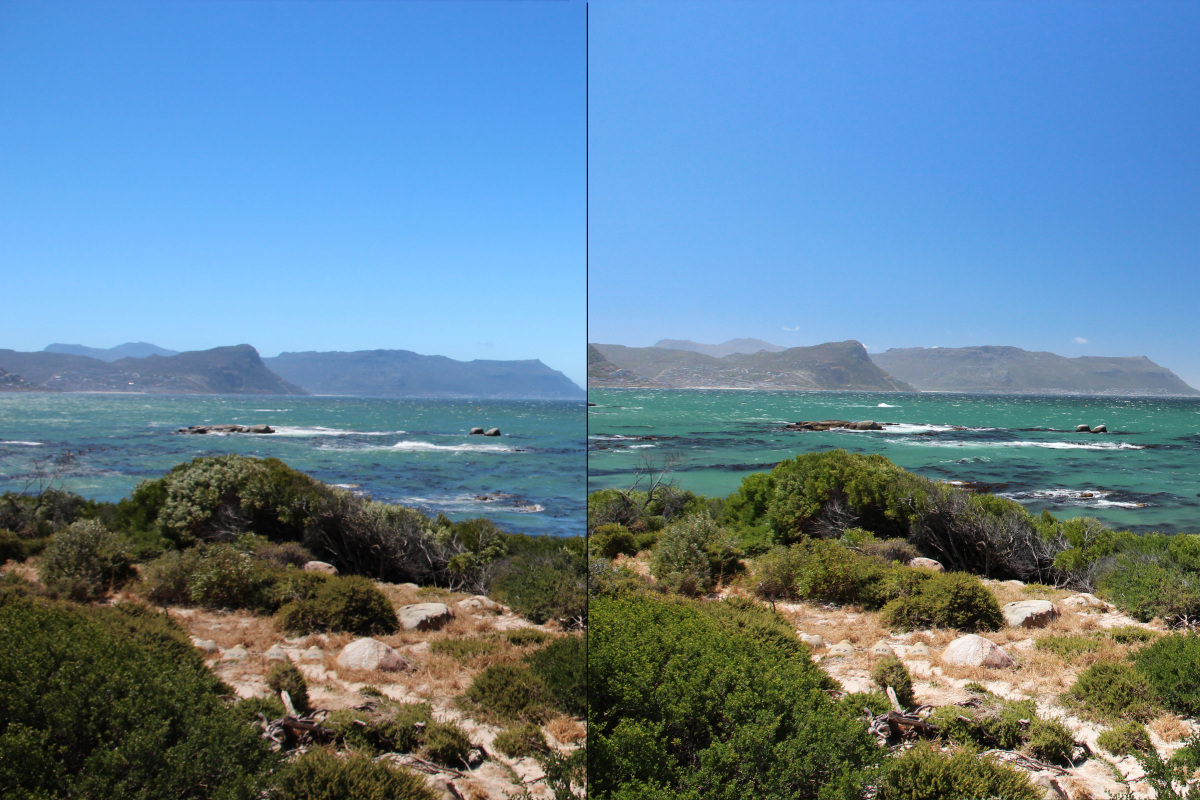
Water
– When shooting a picture of water adjusting your polarising filter will mean you see into the water differently, cutting out glare and even changing the colour of the water. For example when I was snorkelling off a boat off the coast of Indonesia a few years ago I took a series of photos (on my film camera) using a polarising filter that made the water look crystal clear and a bright blue colour. Without the filter the shots had nowhere near the same impact with a big reflection being picked up off the top of the water and a murkier colour.
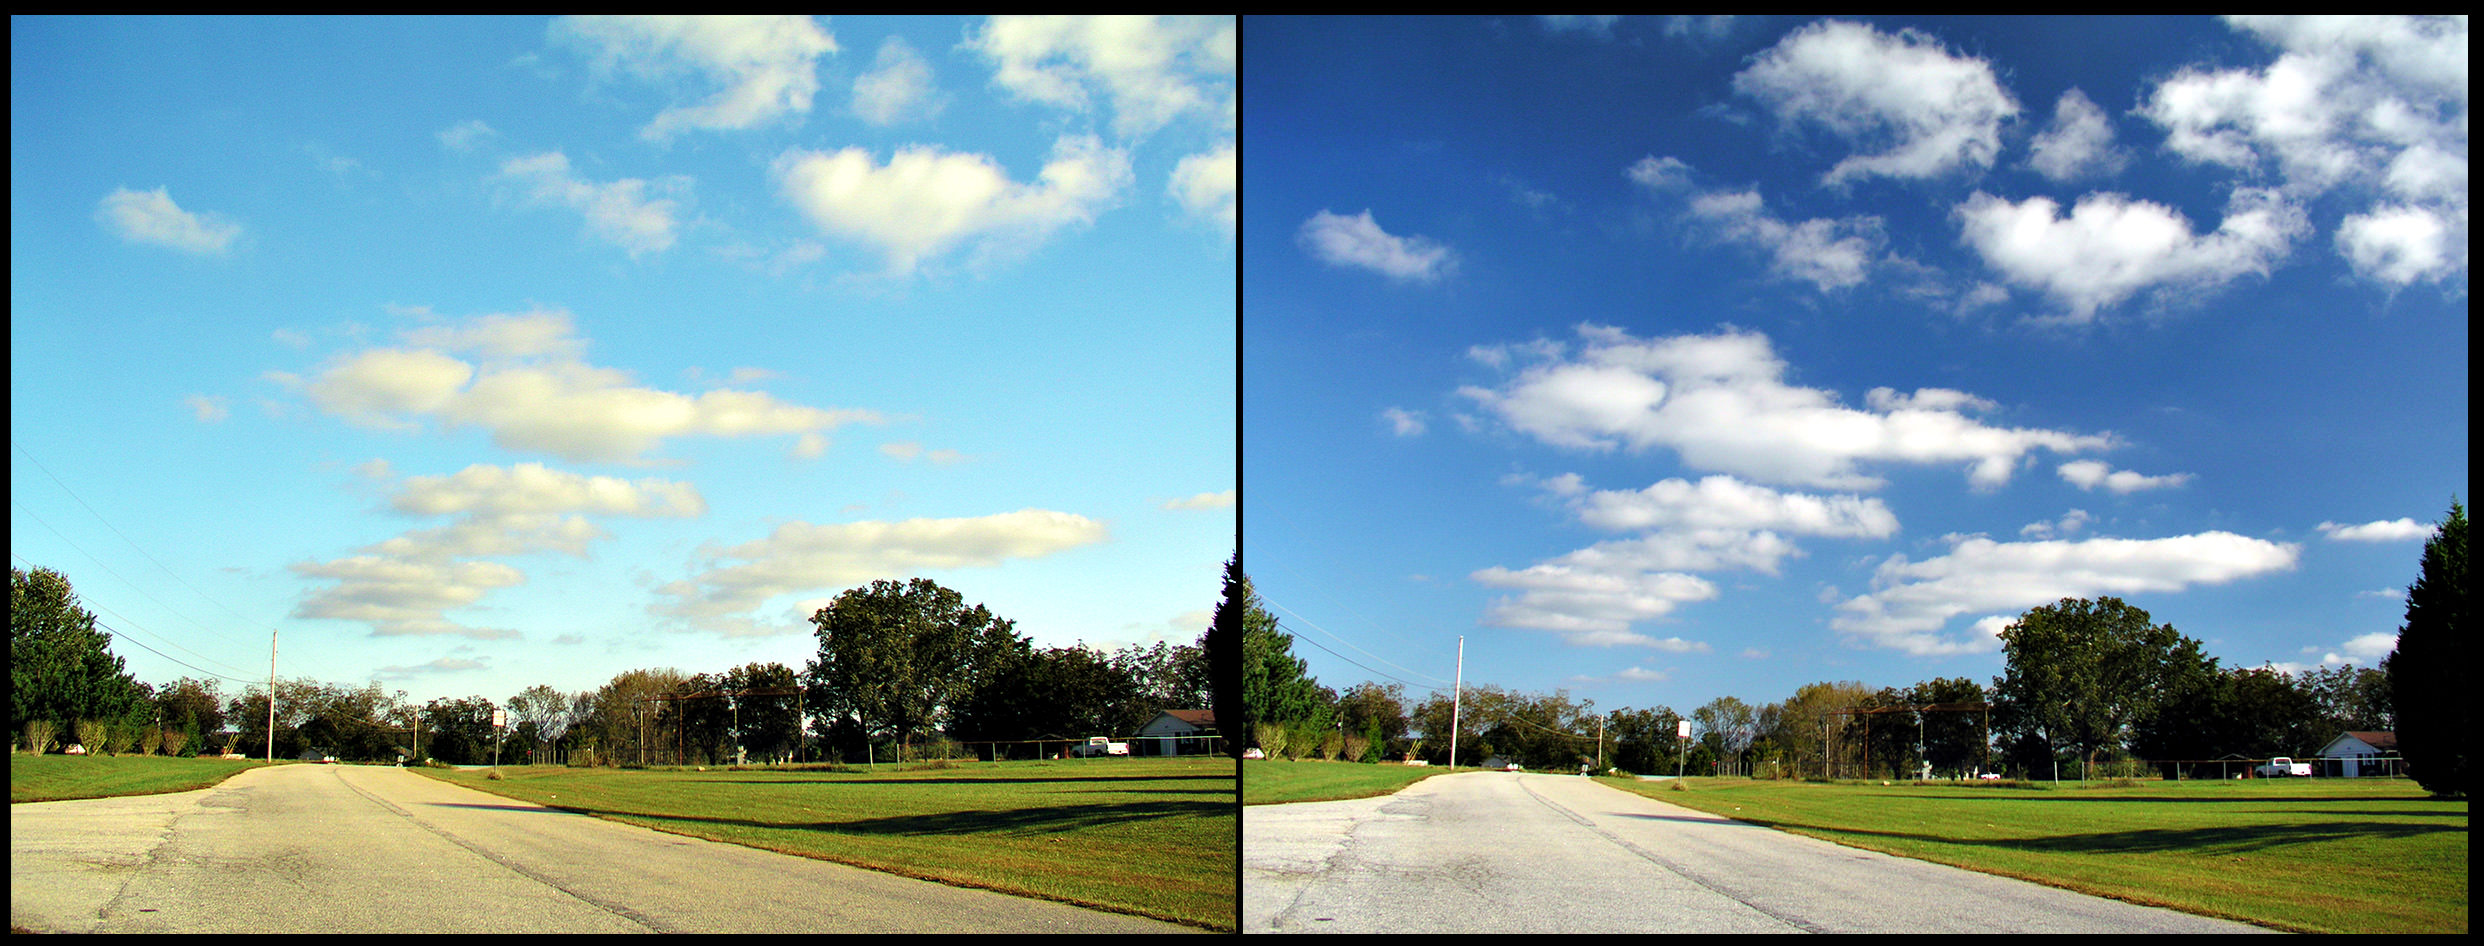
Sky
– Similarly, the colour of sky can change remarkably using a polarising filter. Rotating the filter you’ll see a blue sky change from a light pale blue colour to a vibrant and deep blue colour (depending upon where the sun is). A polarising filter can cut out a lot of the smoggy haze that is often in city shots.
Colour
– polarising filters cut down the reflection that many objects have (even those that you might not think reflect at all). This makes the colours of some of these objects more vibrant. For example out in the garden you might notice foliage on trees looking greener than you would get without the filter.
Other Reflections
– Shooting through glass can be a real challenge at times and using a polarising filter can definitely assist in cutting down distracting reflections or glare. Similarly photographing shiny objects (like a new car for instance) with a polarising filter will change the way reflections are treated.
Lens Protection
Another benefit of fitting a polarising filter to your camera (or any kind of filter) is that you put an extra level of protection between your expensive lens’s glass and anything that might scratch or damage it. A UV filter is probably a more appropriate filter for protective purposes (they are cheaper and have less impact upon your shots when you don’t want the polarising effect) but a polarising filter is definitely more preferable to break or scratch than your actual lens.
Polariser's Change Exposure
One factor to consider with polarising filters is that they change the exposure needed for a shot. When you see a polarising filter you’ll notice that it looks quite a lot like a sunglasses lens (see below for how you can actually use sunglasses as a filter). The filter is dark and works by cutting out some of the aspects of light (similarly to sunglasses). As a result less light gets through to your image sensor and you’ll need to either use longer shutter speeds, a larger aperture or to beef up your ISO setting to account for this. The difference that you’ll need to account for is 1-2 stops. It’s for this reason that you won’t want to use a polarising filter at night.
As mentioned above – a polarising filter looks a lot like a lens from sunglasses. The similarities go beyond looks as they actually function in a similar way.
In fact one way to test the impact of polarisation filters on your shots without actually buying one is to get a pair of sunglasses (make sure they have polarisation filtering in them – many cheaper ones don’t) and put them across the front of your camera’s lens.
Rotate the sunglasses around while looking at a blue sky, ocean or some other reflective surface and you should see some changes in how light is seen.
Unfortunately for many of you with point and shoot cameras – this will be pretty much your only option for using a polarising filter as many have no way of attaching them to your camera.
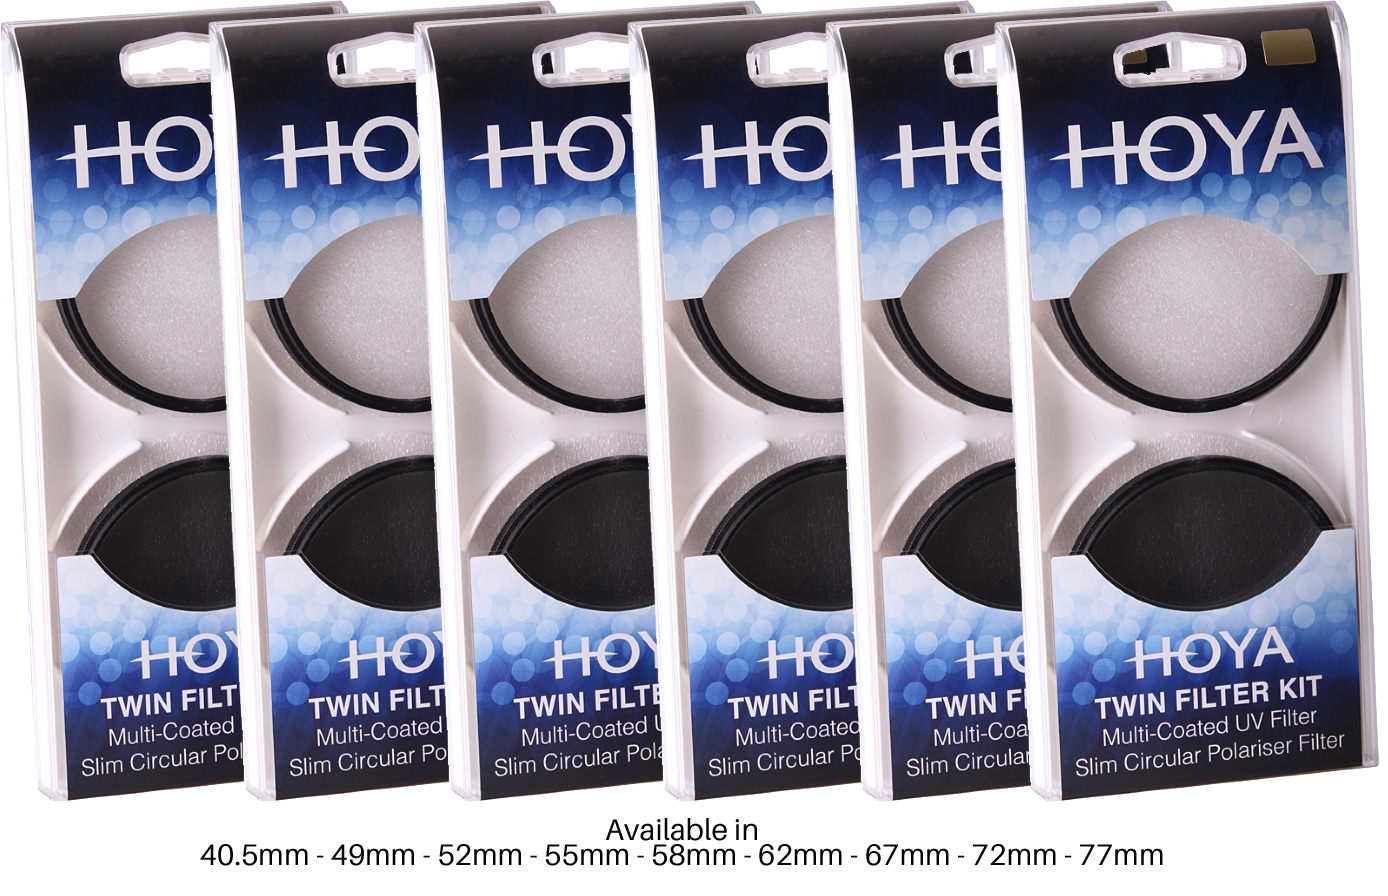
Choosing a Polarising Filter
DSLRs take screw in filters that attach to the end of your lens via a screw in thread. If your camera is an Autofocus one (as most of us have) you’ll need a ‘circular polarizer’.
Take note of the diameter of your lens before making a purchase as there is a large variety of lens sizes. There is a variety of brands and qualities of filters available on the market. I personally use Hoya filters and have found them to be of a good quality. Keep in mind that polarizers are not cheap filters (when compared for example with UV filters) and that they get more expensive the bigger the lens diameter that you have. As a result you might want to just buy them for select lenses (for example I only have them for two of my lenses – lenses that I typically use for landscapes and outdoor photography).
Using a Polarising Filter
These filters are easy to use. Most users will use a circular polarising filter which allows you to adjust how it impacts your shots but simply rotating the front element of the filter. As you do this you’ll notice that colours and reflections in your shot change. Once you’ve got it to a point that you like simply take the shot.
For the greatest impact try to keep the sun at 90° to you (i.e. to your side – not at your back and not shooting into the sun). This will help your polariser to have the greatest effect.
Be aware that shooting in low light, overcast days or at night with a polariser is not advisable – it’s like wearing sunglasses indoors and will cut down the amount of light getting through to your image sensor.