


This entry was posted on October 1, 2021.
From building your portfolio for university to selling your artwork, there are thousands of reasons you may need to photograph artwork. Maybe you’re a tattooist looking for the best way to showcase your skills, or perhaps your heart’s set on photographing artwork professionally.
No matter where you’re coming at it from, if you’re worried your pictures won’t do your paintings, drawings, or collages justice, keep reading. Today we’re exploring all you need to set up your shots and light your artwork photographs like a pro.
The best bit is, you don’t even need to buy an expensive camera or anything to achieve this. We’re going to teach you how to take amazing photos using just your iPhone. (Though, of course, we will always advocate the likes of a DSLR or mirrorless camera for the absolute best photos possible).
First off, though, an important question for artists who prefer traditional methods to digital mediums.
How do you photograph artwork on paper?
1. Hang your artwork on the wall
And make sure it is completely flat. If your paper is not properly secured to a flat surface, it will cast shadows across the wall.
Now, you want to use a neutral-coloured wall for this - one that’s white, black, grey, etc. - so you don’t distract from the artwork. Hang the piece up so that the centre of the paper is parallel to your camera lens.
For the best results, we’d recommend using a tripod, so you get a clear and focused final image.
2. Get your lighting right
There are a couple of ways you can make sure the lighting is right when you are taking pictures of artwork on paper.
Firstly, you can use natural light - either indoors, in a room with lots of windows, or outside, when it’s cloudy (but not raining). You might think it’s better to take your photographs when the sun is out, but they’ll look a lot better in indirect sunlight.
Indirect sunlight is the best natural source of diffused light. Which is also sometimes known as ‘dispersed’ or ‘soft’ light, but they all mean the same thing. Basically, it provides a kind of filter, so there’s no reflection or glare from the sun off your lens.
If the weather is too gloomy, you can achieve the same effect with an artificial lighting kit. To photograph artwork on paper, you’ll only need two lights. Set those up halfway between the camera and the paper at a 45-degree angle, point them towards the wall, and you’re good to go!
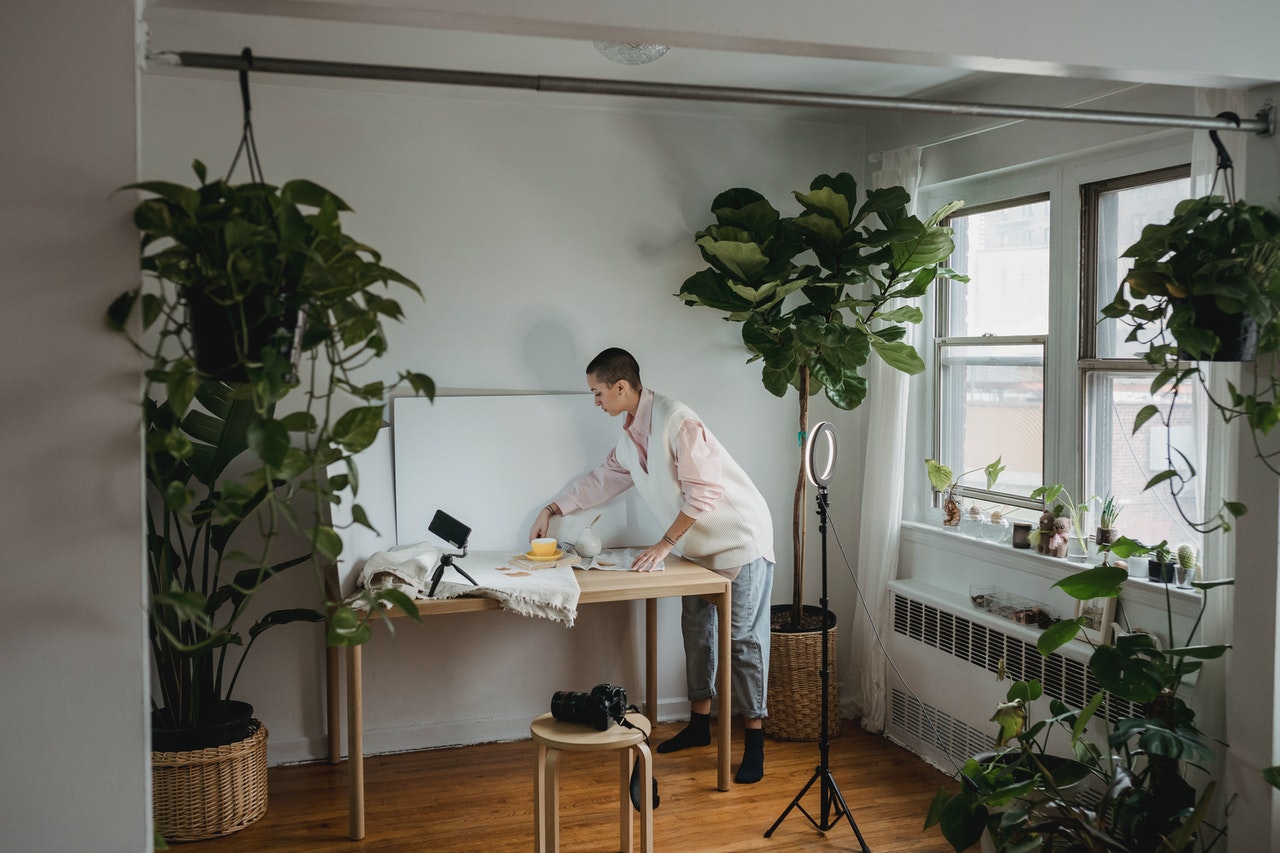
3. Set up your camera
Position your camera at a suitable distance, so that your entire artwork fits in the frame. And don’t forget what we said before - your lens needs to be parallel with the middle of the paper.
Additionally, you will want to set the ISO and the aperture of your camera up specifically for taking pictures of artwork on paper. For the clearest, crispest images, you will want to use a low ISO. The ideal aperture for photographing works in this medium is between f-8 and f-11.
How do I photograph artwork on my iPhone?
You don’t need a dedicated camera to photograph your artwork, especially when you’re just starting out. We would absolutely advise investing in one for the long term, but right now, you can take studio-worthy shots using your iPhone.
iPhones have high-resolution cameras that are only getting more sophisticated with each upgrade. The following features will help you when you are using yours to photograph your artwork:
- Grid mode - divides the screen into nine equal squares. This lets you see where the centre is and align the focus of your photo.
- Manual focus and exposure - gives you more control over the final image than auto settings do.
- Timer - iPhones are much lighter than normal cameras, meaning they’re more difficult to hold still. Putting your phone on a stand and using the timer option to take several photos in rapid succession will increase your chances of taking a sharp and usable image.

Is it better to scan or photograph artwork?
Well, this all depends on the size and the medium of the piece, as well as what you’re planning to do with the final print.
Scanning is fine for small pictures, but once you get above a certain size, you won’t be able to fit your entire artwork onto one sheet of paper. Most standard scanners stop at A3 paper size. And while you can scan your picture in sections and patch it together on the computer later, this is a very time-consuming way of reproducing your artwork.
Plus, if your painting is very detailed or textured (e.g., done in heavy oil paints or acrylics), you may not be able to scan it accurately or in a high enough quality to see all the little details.
So generally, we’d say it’s better to photograph your artwork, rather than scan it. You might find simpler 2D art, or works without acrylics or oils, can work perfectly well being scanned. However, since more complex and larger pieces require skilful camerawork, it’s better to be comfortable photographing art than reliant on scanning it.
How do I take photos of my art portfolio?
As an artist, it’s important to learn how to photograph and digitally edit your works for your portfolio. Particularly if you want to show them off at their best.
Don’t try and get overly creative – shoot one piece at a time and fill your camera frame with the artwork as best you can. Choose your equipment and software carefully, and take the best photos for your portfolio by following these three simple steps:
1. Buy/assemble your equipment.
ARTnews has ranked the Fujifilm X100V camera as one of the best mid-range point-and-shoot digital cameras for artists this year. But we’ve also shown you how to take impressive photos on your iPhone; go forth with your grid mode, manual focus and timer features and you’ll find your mobile plenty capable of photographing your art portfolio.
Once you’ve got your camera to hand, you then need to set up your lighting - whether natural or artificial - and get snapping. For best results, use a light on either side of your art at a 45-degree angle.
2. Don’t use flash.
Especially if your artwork is bright and eye-catching. In addition to causing unsightly lens flares, the flash can take all the colour and texture out of your paintings. So, your best choice for lighting is the dispersed lighting we discussed earlier.
3. Edit your photos.
Raw, unfiltered photographs rarely stand out as much as pictures that have been subtly edited. Apps like Lightroom or Photoshop are popular choices for a reason, with the ability to make precision tweaks to everything from contrast to colour balance, saturation and more.
Keep in mind, though – less is often more when it comes to photo editing. Don’t overdo it.
Remember, your portfolio is designed for you to be able to show off your art. You want to make your pictures look good without detracting from the brilliance of your original piece.
Final words
Knowing how to photograph artwork in different mediums is immensely important when you’re looking at creating a portfolio or even selling some of your pieces.
Hopefully, you should now understand how to set up your shoot and use lighting to capture your art in its best light. We’ve also given you some handy tips on how to take great pictures of artwork using your iPhone… but while you’re here, why not check out the cameras in our catalogue?
Smartphones have become mighty impressive in recent years, but they’re still a long way from the quality you can achieve with a dedicated camera. You’ll find some very attractive deals among our used cameras that we’re sure you’re going to love.